How to Build a Church App
It’s no secret that the world has gone mobile. We’re living in an era where our smartphones are within an arm’s reach at all times, day or night. What’s everyone doing on those devices? Using mobile apps. The potential use cases for mobile apps are seemingly endless.

Additional Articles For Every Stage Of The App Life Cycle
How To Build A Mobile App Guides

We can think of countless reasons to build a church app. From promoting events to collecting donations, a church app can help modernize your congregation. (And of course, although we’re using the term “church” here, everything applies equally well to temples, synagogues, mosques, etc.)
Fortunately, building a church or ministry app on your own has never been easier. Anyone can build an app with the BuildFire platform, regardless of their technical skill level.
This guide will take you through the step-by-step process of building a church app. You’ll also learn how to collect donations and get advice on the best features for your religious app.
How to Build a Church App in 6 Simple Steps
The easiest way to build a church app is by starting with the home screen and main features. We’ll start by assigning a home screen feature and then continue building the app out from there.
Step #1:Navigate to the Feature Marketplace

- Click on the “Features” tab on the left side of your admin dashboard.
- Then select “Marketplace” from the expanded menu.
Step #2: Browse For a Home Screen Feature
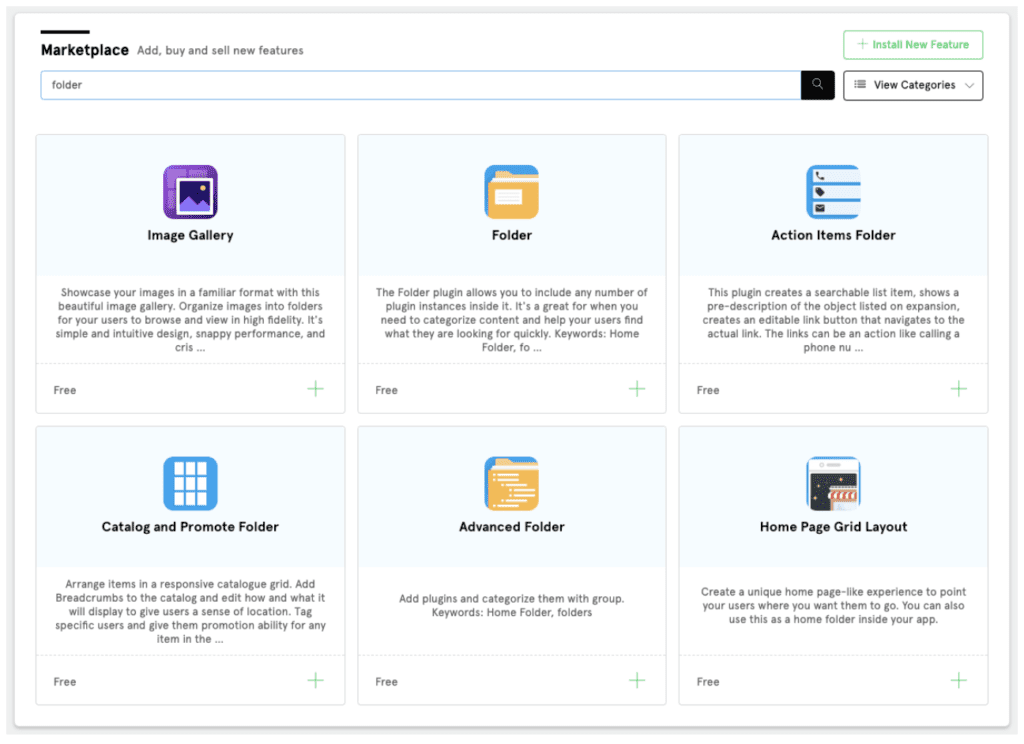
The BuildFire Marketplace has dozens of plugins to use for building your church app.
Start by finding one for your home screen. You can either scroll through the pages or use the search bar. Top home screen plugins include:
The folders are ideal for organising your app’s content. Display options will vary between the Folder and Action Items Folder.
Use the Catalog and Promote Folder to highlight key features, such as your church’s weekly bulletin. You can send a push notification to app users for each new promotion.
The Grid Layout Launcher will display your app features in a grid. This is ideal for user navigation.
Step #3: Add the Feature to Your App
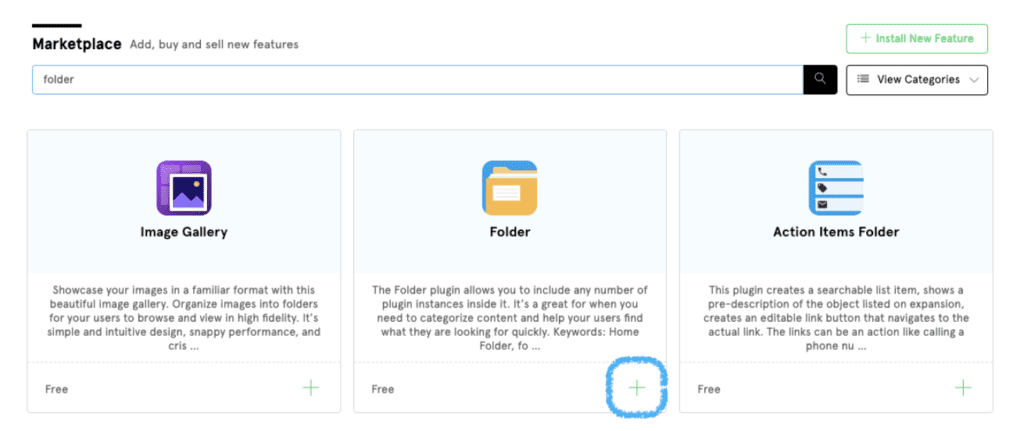
Once you decide which feature will be best for your church app home screen, click the “add (+)” button in the bottom right corner of the feature box.
A pop-up will prompt you to give the feature a title.
Click “add” again.
For the purposes of this tutorial, I’ve selected the Folder plugin.
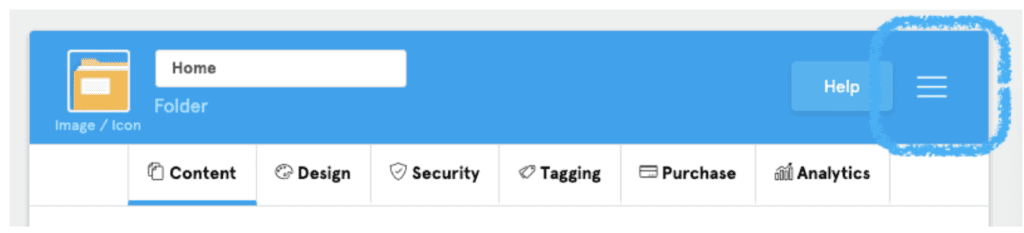
Step #4: Set the Selected Feature as Your Home Screen
Adding the plugin to your app will not automatically assign it to your home screen. You’ll still need to take a few more steps.
- Return to the “Features” menu on the left side of your screen (explained in step #1).
- Click on “My Features” from the drop-down list.
- Find the selected plugin (I’m using the Folder feature).
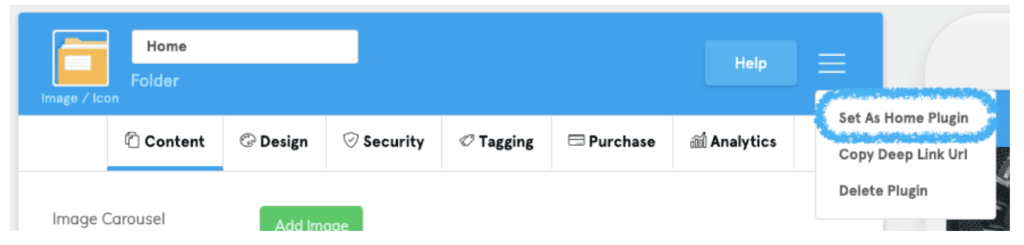
- Navigate to the hamburger menu in the top right corner.
- Choose “Set As Home Plugin” from the expanded list.
Step #5: Continue Adding Features From the Marketplace
After you assign a plugin as your home screen, return to the Feature Marketplace and browse for additional features. Here’s a quick recap on that process:
- Click “Features” on the left side of your dashboard.
- Navigate to “Marketplace.”
- Scroll through the options or browse using the search bar.
- Click the “add (+)” button in the bottom right corner of a feature box.
- Give the feature a title and click add again.
Step #6: Add the Most Important Features to Your Side Menu
Your church app’s side menu will give users the ability to access top functions from anywhere within the app.
Here’s how you add a feature (previously added from the marketplace) to your side menu:
-
- Click on the “Design” tab on the left side of your dashboard.
- Select “Side Menu” from the expanded list.
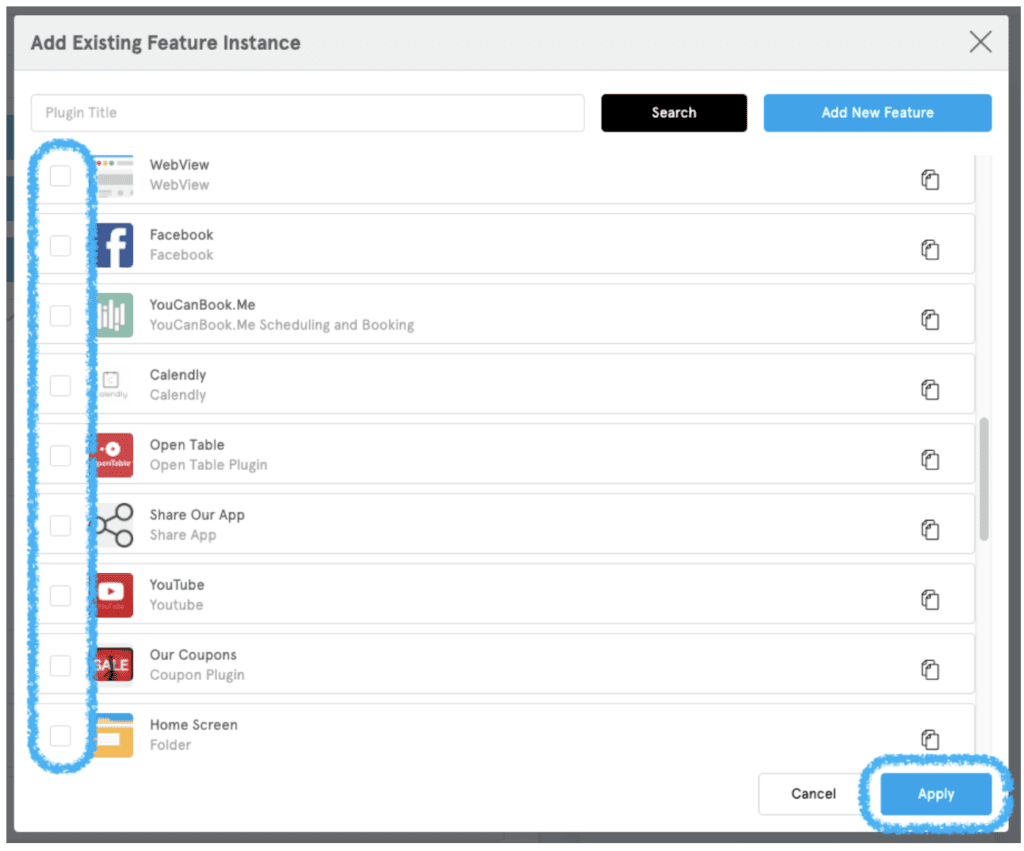
- Click “Add Existing Feature” at the top right corner of this screen.
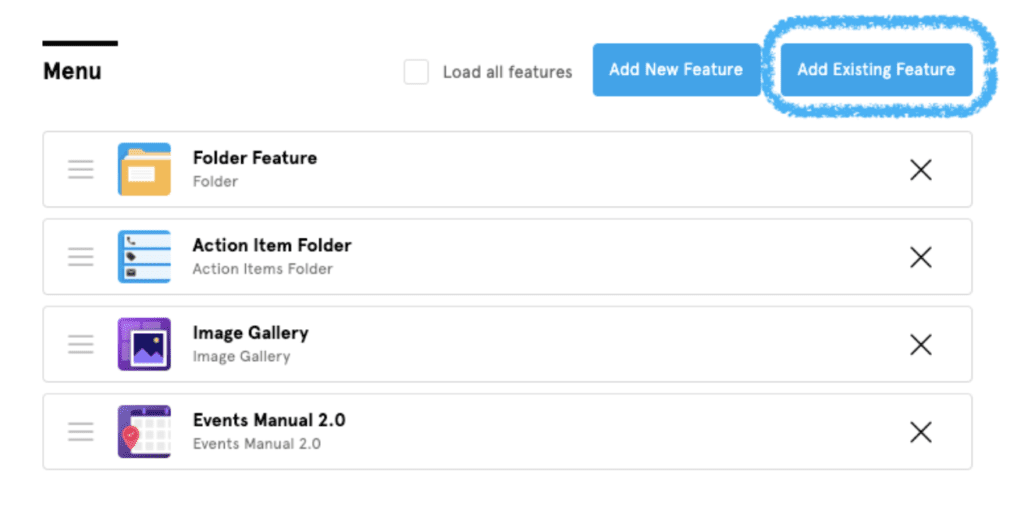
A list will appear with all of the features that were already added to your app. There will be an empty checkbox next to each plugin that is not on your side menu.
- Check the boxes for features you want to add.
- Click “Apply” in the bottom right corner.
That’s it! Your church app is being constructed right in front of your eyes. Just repeat this process as much as needed whenever you add new features.
How to Collect Donations in Your Church App
The majority of churches and nonprofits rely on donations to stay operational. These typically come in the form of tithes, offerings, and periodic singular donations.
You can collect donations directly from your religious app. This is perfect for those people who can’t always attend your weekly gatherings. It’s also easier and faster than mailing checks.
Step #1: Add the “WebView” Feature From the Marketplace.
By now, I’m sure you’re an expert at adding new features to your app. But here are those steps one more time:
- Click “Features” on the left side of your dashboard.
- Navigate to “Marketplace.”
- Search for “WebView” (or scroll until you find it).
- Click the “add (+)” button in the bottom right corner of the WebView feature box.
- Give the plugin a title, such as “Tithe” or “Donations.”
As the name implies, the WebView plugin points users to website content from your app.
Step #2: Paste Your Donation Page Link
Whether it’s on your own website or a third-party site, copy the direct link for people to donate online. Then complete the following simple tasks:
- Click on the “WebView” plugin from the “My Features” menu.
- Navigate to the “Content” tab at the top of the screen.
- Paste your donation link in the “URL” field.
- Select the “Device’s default external browser” option.
- Click the green “Validate” button.
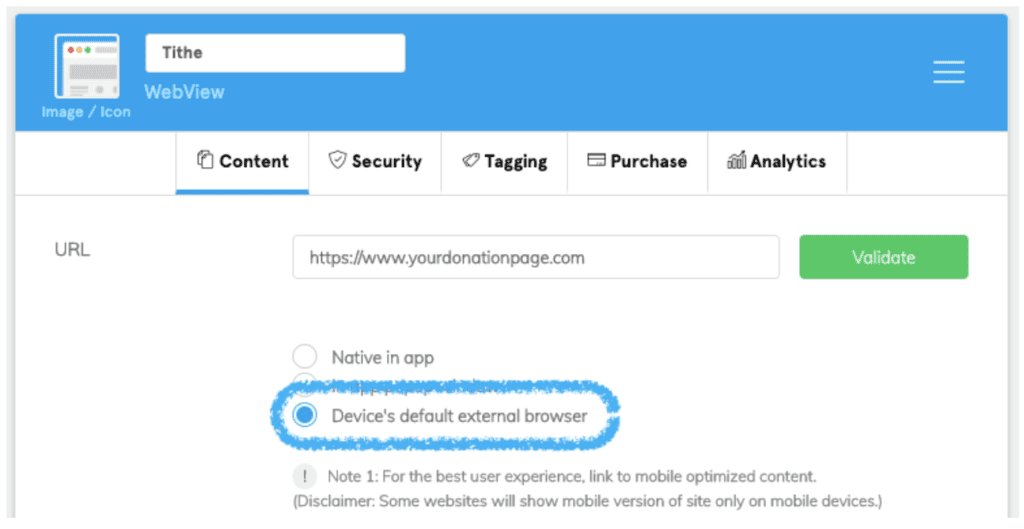
Note: You must select “Device’s default external browser” to remain compliant with Apple and Google’s current app store guidelines. Otherwise, your app could be rejected during submission.
Top Features For a Church App
The Feature Marketplace is filled with various plugins to simplify the app development process. I’ll explain which ones we recommend for your church app and why.
Click on each feature for an in-depth tutorial and a more detailed explanation of how it works.
Folders
We talked about folders earlier during the instructions for adding a home screen feature. These are the top folders to consider for your religious app:
Folders
We talked about folders earlier during the instructions for adding a home screen feature. These are the top folders to consider for your religious app:
Each folder will display content slightly differently. But all of these are perfect for organizing content. You can even house folders within other folders.
Contact and Information
You can use your religious app as a way for users to get to know you better. The app can also provide vital information to new and prospective members.
Here are a few features to consider for these purposes:
The People plugin is perfect for introducing your staff and pastoral team. You can also use it to highlight the different ministries you currently run. Use this feature to provide a biography and fun facts about your leadership roles.
Contact Us basically provides an “about us” function. Showcase information about your church as well as contact information (phone numbers, email addresses).
Some churches have more than one location. In these cases, the Places 2.0 plugin will provide directions and contact information for each site. You can even utilize this plugin with a single location. Use it to show directions to other ministries or small groups held throughout the year.
Content Features
One of the best parts of a church app is the ability to access things like weekly sermons, lessons, religious songs, and things of that nature.
The Seminar & Lecture Notes plugin is arguably the most popular church app plugin that we’ve seen. Users can bookmark their favorite sermons and even add their own notes. You could use it to provide a series of free lessons or charge a fee in the form of in-app purchases and subscriptions.
With the Media Center Manual plugin, you can put multiple media types (songs, podcasts, videos, etc.) into a single feature. If your church has a blog, you can use the Media RSS feed to showcase those posts within your app.
Use the Flashcards plugin for things like Sunday School lessons, weekly quizzes, questions, or talking points.
As previously discussed, the WebView plugin brings website content to your app. You can use this for something like Bible access, by adding Bible.com or Bible Gateway to WebView.
Video Content
If you record videos of sermons or anything else, you can use these plugins to showcase them within your app:
Just sync the feature with your YouTube or Vimeo account, and the videos will automatically show up in the app.
Events
Every church and religious group has events. From daily or weekly sermons to fundraisers and holiday events, these are the top plugins to consider using:
The Events Feed and Events Manual features are pretty self-explanatory. They both allow you to highlight upcoming events and give users the ability to add events to the personal calendars on their phones.
I’d also recommend the Image Gallery plugin to highlight photos from past events as a promotional method. This can help boost your event attendance and participation.
If you already use Calendly for scheduling, this feature will allow users to set appointments for things like one-on-one meetings with a pastor.
Social Sharing
Lots of churches have an active presence on social media. To add your social pages and feeds to the app, use the following features:
We talked about the versatility of the Folder app earlier. You can use it here to house all of your social media content in one place.
Use the Share App as a way for users to recommend the app to their family and friends. This is one of the best ways to organically grow the user base for your church or ministry.
Creating a Church App With BuildFire
Building a church app on your own with the BuildFire platform is simple. The whole process can be explained in the following steps:
- Browse the Feature Marketplace.
- Add the features you want to use.
- Customize your content and put the top features on your side menu.
That’s it! You can even use your Church app to collect donations. Keep this tutorial close and use it to walk you through the app building process for your church or ministry.