Learning how to code Xcode is an important skill for any Apple developer. You’ll be writing code on Mac to create applications for the App Store.
The great part about Xcode is its versatility for iOS development and building applications across different Apple devices. It supports development for iOS apps, macOS apps, tvOS, iPadOS, and watchOS.
New to Xcode? That’s why we created this guide.
This in-depth Xcode tutorial is designed for complete beginners. It explains everything you need to know about Xcode, how it works, and how to learn Xcode.
Key Takeaways
- Official Apple Tool: Xcode is the only official Integrated Development Environment (IDE) for creating and publishing apps on the Apple App Store.
- System Requirements: You must have a Mac running macOS 10.14.4 or later with at least 7.6 GB of available disk space.
- Language Support: While it supports many languages, Swift is the primary and recommended language for modern Apple development.
- Beginner Friendly: Xcode offers a user-friendly interface and templates, but users still need a foundational understanding of programming.
- Cross-Platform Alternatives: Tools like Buildfire SDK offer alternatives for those looking to build for both iOS and Android using web technologies.
What is Xcode?
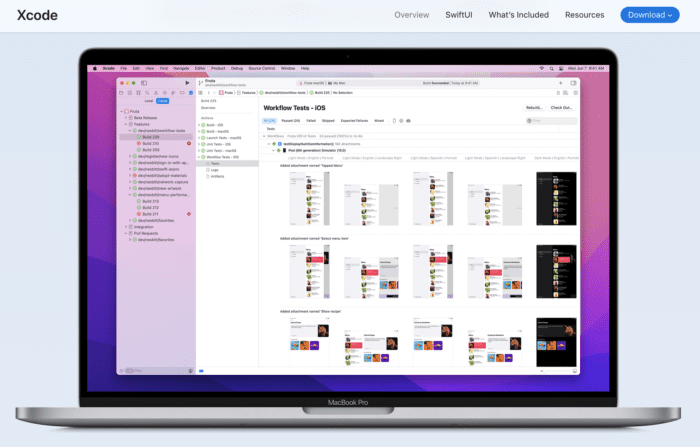
Xcode is Apple’s official IDE (integrated development environment). It was released in 2003 specifically for building software on Apple platforms.
IDEs are centralized environments that consolidate the different aspects of building software. Unlike other IDEs, Xcode is only available for Mac, and it’s an all-in-one solution to build and code an app.
An Apple developer can use Xcode to create apps for iPhone, iPad, Mac, Apple Watch, and Apple TV. It’s most commonly used for iOS app development (creating a mobile app).
Swift 5.5 and SDKs for iOS 15, iPadOS 15, macOS Monterey, tvOS 15, and watchOS 8 are all included with Xcode 13.
Xcode is the only official tool for creating and publishing apps on the Apple App Store. It’s designed for beginners and experienced developers alike.
Xcode comes with all of the tools and resources you need to create an app within a single source of truth—including a compiler, text editor, and name system. This makes it possible to not only write and compile but also debug an app.
Once you’re done writing code, you can submit your app to the App Store with ease.
Xcode contains lots of great tools that help streamline the development process, making it easy for experienced developers to push apps out quickly. But it’s also a user-friendly IDE, so the learning curve isn’t as steep for beginners.
This is the only official way to create apps by Apple. Xcode comes with excellent debugging tools that make it easy for developers to troubleshoot problems faster. The platform also comes with project management resources to help you stay organized with coding files, image assets, and everything else you need to create a great app.
Xcode Requirements
Before you start, ensure your hardware meets these minimum specifications:
- Operating System: macOS 10.14.4 or later
- Disk Space: Minimum 7.6 GB of available hard drive space
- Hardware: Mac computer (required for official support)
For those of you who don’t meet these requirements, there are some alternative methods you can try for writing Xcode in older Mac visions or PCs. But with that said, this is generally not something that we recommend.
Getting a Mac is your best option here. The workarounds for other devices can be tricky and could not only impact your experience but also affect your app.
Is Xcode Good For Beginners?
To clarify, Xcode is an IDE (integrated development environment). It just provides developers with a user interface for writing code. As a programmer or developer, you still need to have a basic understanding of programming languages before you can start using this interface builder and code editor.
Xcode is a tool that helps you write code for Apple platforms, but it won’t teach beginners how to write app code. You still need to learn that on your own.
A complete beginner with no prior coding knowledge could not download Xcode and immediately start to create apps. With that said, once you have the coding knowledge, Xcode has a friendly UI that’s easy for beginners to navigate and understand.
What’s the Best Way to Learn Xcode?
The best way for beginners to learn Xcode is through Apple’s own documentation. If you’re starting from scratch, Apple has excellent developer resources that will teach you how to code.

It’s in your best interest to learn Swift—the official programming language to build apps for the Apple App Store and Mac App Store.
The great part about using a Swift tutorial from Apple is that you’ll be learning to code and building a foundation for navigating Xcode simultaneously.
Swift Playgrounds is another option to consider. This is an iPad app that teaches you how to code and create apps with Swift. You can also explore app forums, Udemy, Codetree, and other online resources that can teach you about Xcode, Swift, and source code.
How Does Xcode Work
The first thing you need to do is install Xcode. To start a new app project in Xcode, you’ll need to select a template for the platform you want the app to run on. Then choose the type of app you want to create (game, single view, document based, etc.).
Starting with the right Xcode template is a crucial step to ensure you can start creating an app as quickly and efficiently as possible.
Configuration
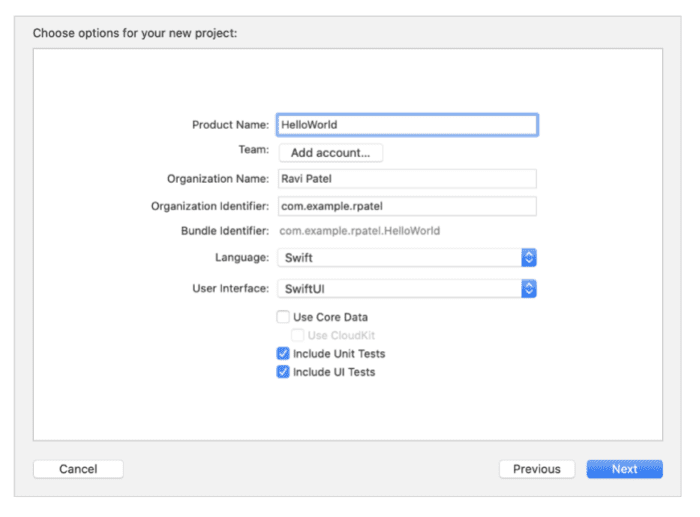
Before you start to develop anything, you need to provide Xcode with information related to yourself (as the developer) and your app. This includes:
- Product Name — Your app’s name as it will appear in the Apple App Store and on devices when it’s installed. Product names must be at least two characters and less than 255 bytes. It should be similar to the name that you’ll ultimately enter in the App Store Connect.
- Organization Identifier — This is a reverse DNS string to identify your organization. For those of you who don’t have a company identifier right now, you can use com.example. as a placeholder until you distribute your app. This must be replaced before distribution.
- Organization Name — This is the name that will appear in all boilerplate text in your project folder. This is not the same as the name that appears in the App Store for your app.
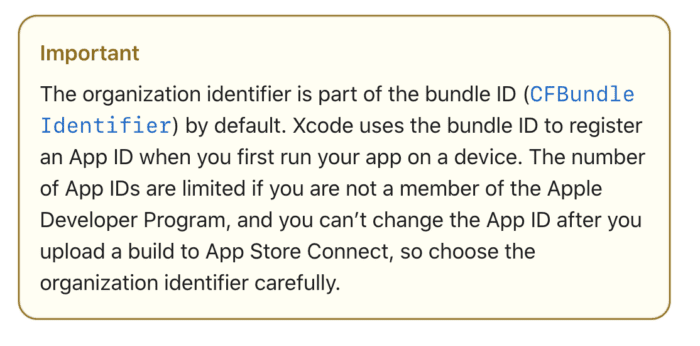
It’s worth noting that you cannot change your App ID after it’s been uploaded to App Store Connect. Here’s the official wording from Apple:
Creating a Project
Here’s a quick overview of the steps you must follow to start a new project:
- Download Xcode and launch it on an Apple platform.
- Select “Create a new Xcode project” in the welcome window or navigate to File > New > Project.
- Select a template (iOS, watchOS, macOS, Cross-platform).
- Fill out all of the required information.
- Choose your language and user interface (for example, Swift and SwiftUI).
Choosing SwiftUI also gives you the option to develop for all platforms and view an interactive preview of your layout.
Managing Files
Any time you start a new project or re-open an existing project, Xcode will open your main window. This shows all of your code files and required resources to create your app.
You can use the project navigator as a way to quickly access different areas of the project.
All details about the files you select will be shown in the “inspector” portion of Xcode on the right side of the screen. You can always hide this to free up space on your screen as well.
The “toolbar” is where you’ll create and run your application as a simulator or from a real device. If you’re building an iOS app, just select an app target and simulator from the toolbar menu before clicking the run button to
Get a free consultation to learn more about our custom app development services.
Frequently Asked Questions
What is Xcode used for?
Xcode is Apple’s official integrated development environment — the only one for creating and publishing apps on the App Store. It supports development across iOS, macOS, tvOS, iPadOS, and watchOS.
What do I need to run Xcode?
A Mac running macOS 10.14.4 or later, with at least 7.6 GB of available disk space.
Which programming language should I learn for Xcode?
Swift is the primary and recommended language for modern Apple development, though Xcode supports several others.
Is Xcode good for beginners?
Xcode offers a user-friendly interface and project templates that help you get started, but you will still need a foundational understanding of programming to use it well.
Can I use Xcode on Windows?
No. Xcode requires a Mac — you write code on macOS to build applications for the App Store.