The ecommerce industry is booming, and mobile shopping trends dominate the overall ecommerce category.
In fact, 73% of the total ecommerce market share worldwide comes from mobile commerce. 79% of mobile users have purchased something online from a mobile device within the past six months.
But not all mobile shopping experiences are created equally. 85% of people say they prefer mobile apps to mobile sites, and apps convert at a 157% higher rate compared to the mobile web.
So if you want to maximize the potential of your ecommerce operation, creating a shopping app is the way to go.
This ultimate guide will walk you through the step-by-step process to create a shopping app.
How to Create a Shopping App in 9 Steps
Anyone can make a shopping app by following these simple steps:
- Market Research for Your Online Store
- Platform and Tech Stack Selection
- Choose Agency for Shopping App Development
- Identify Features for Minimum Viable Product
- List Additional Features for Your Store to Stand Out in the Future
- Create a Mockup of Your Online Store App
- Begin Mobile Shopping App Development Process
- Test Your Shopping App
- Launch Your Shopping App
By the end of this guide, you’ll have a complete understanding of shopping app development and how to succeed in this space. Let’s dive in!
Step 1 — Market Research for Your Online Store
Before you start building anything, you need to validate your idea with market research. This step will look a little bit different for everyone, depending on the stage of your business.
There’s a good chance you fall into one of two categories:
- You have an existing ecommerce business and want to add a mobile app
- You’re starting a new business from scratch and want a mobile app on day one
For those of you who are already selling products online, you probably went through the market research step when your business first launched. So some of these tasks may be a bit repetitive.
Anyone starting a new shopping business from scratch must take the market research step very seriously. Otherwise, you could pour money into a business that the market doesn’t want or need.
Identify Customer Needs and Requirements
The first thing you need to do is identify a target customer profile. Who are you selling to?
Selling to “everyone” is not a recipe for success. You need to narrow things down to an ideal customer profile. Then you need to find out if your products actually meet a market need for your ideal customer.
Running a SWOT analysis is the best way to start your research.
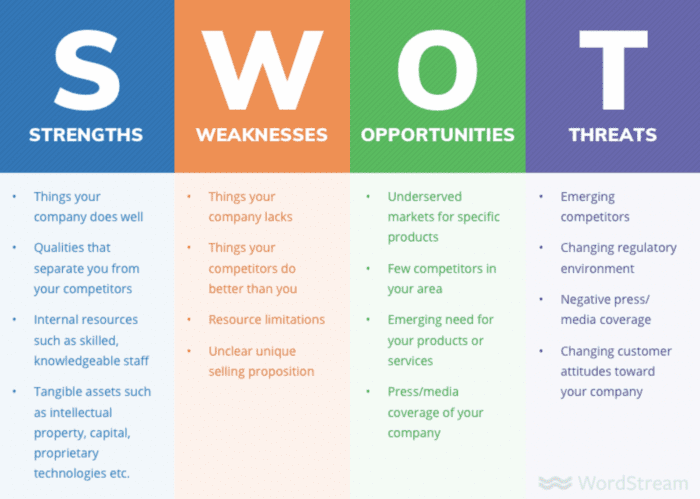
This process not only looks at your potential customers but it forces you to evaluate your internal initiatives, competitors, and overall market landscape.
Very few new businesses offer something that’s 100% unique to the market. There’s a good chance there are other online stores and shopping apps selling something that’s almost identical to your offer.
What makes your product unique to the market? Are you taking a broad product and targeting a niche audience? How will your value proposition stand out from the competition?
These are the types of questions you need to ask yourself and answer with confidence before you can proceed.
Business Model
Shopping apps typically fall into three different models:
- B2C — Business selling products directly to consumers.
- B2B — Business selling products to other businesses, sometimes at wholesale.
- C2C — Customers selling to other customers through an online marketplace (like eBay or Etsy).
Which model are you going to use for your shopping app?
Monetization Strategy
Next, you need to determine how you’re going to make money from your shopping app.
Compared to other mobile app categories, shopping apps are fairly straightforward. For B2C and B2B shopping apps, your primary focus should be sales revenue. I would not recommend adding ads to your shopping app, as this can ruin the customer experience.
For C2C shopping apps, you can make money by either charging sellers a fee to use the platform or by taking a commission of each sale. You could potentially charge for promoted products to appear high in the search results as well.
Step 2 — Platform and Tech Stack Selection
Once your idea has market validation, you can start to think about the technical aspects of your shopping app.
Choose Your Platform
What platforms are you building for?
- Android — Android apps are available for download on the Google Play Store. Android dominates the global market share, with 71.7% of smartphone users owning an Android device.
- iOS — iOS apps are available to download on the Apple App Store. It’s a bit more challenging to get your apps approved for the App Store, and iOS controls 53.66% of the OS market share in North America.
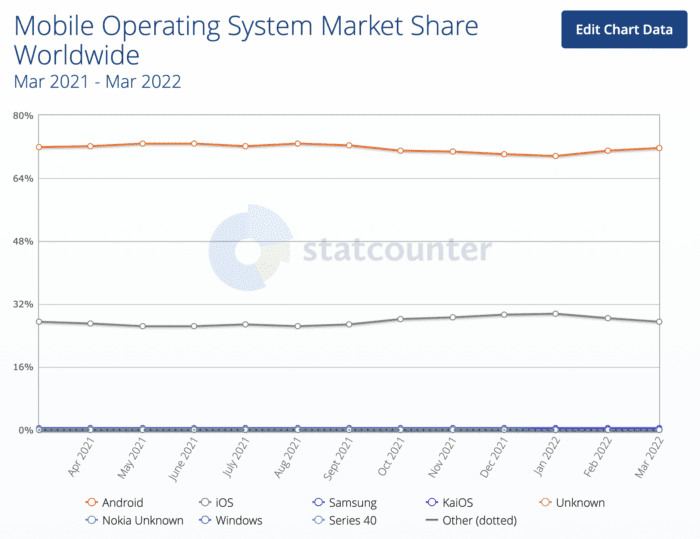
If you’re strictly targeting users in countries outside of North America, it makes more sense to build for Android. But if you’re targeting North American consumers, building for both iOS and Android is the best option.
This will make your shopping app available to the widest possible audience, and you won’t be neglecting any potential consumers.
Native Development
Next, you need to decide on how you’re going to create a shopping app for the platform or platforms you’re targeting.
Native app development requires low-level coding specifically for a single operating system.
So if you want to create an Android and iOS app through native development, you’d essentially be building two completely different apps—one for each operating system.
This is the most time-consuming and most expensive path to development, and it’s typically not necessary for basic shopping apps.
If you want to add complex features like augmented reality built into the app, then you might need to go native. But otherwise, this development path is only necessary for gaming apps, virtual reality apps, or apps that require precision and the highest possible performance.
Cross-Platform App Development
Cross-platform app development is typically the best option for most shopping apps. This means that you can create an app for both iOS and Android with a single build and codebase.
Cross-platform development typically saves you at least 40% on development costs and drastically reduces your development timeline.
If you want to create a shopping app on your own without hiring a developer, you can take advantage of no-code ecommerce app makers like BuildFire.
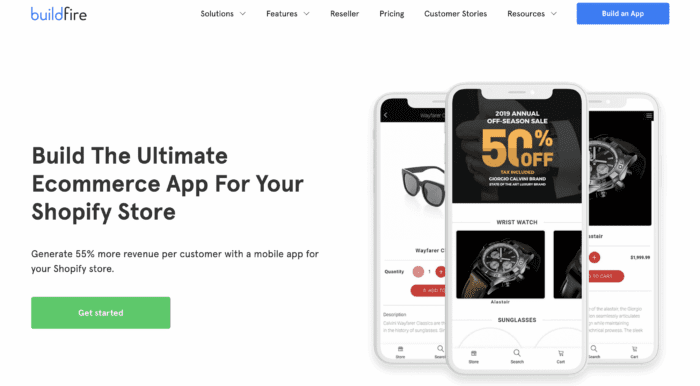
It’s a simple and cost-effective way to create an ecommerce app for iOS and Android without writing a single line of code. So even non-technical users can do this on their own.
Step 3 — Choose Agency for Shopping App Development
Assuming you’re not going to create the app on your own, you need to find an agency that can create a shopping app for you.
This is typically better than hiring a freelance team that hasn’t worked together before. There are lots of different roles and responsibilities in the app development process, so it’s usually best to go with an agency that has a proven track record.
Team Composition
The exact number of developers and team members required will vary slightly depending on your project scope. But here’s a general idea of the positions required to create a shopping app:
- Android developer
- iOS developer
- UX designer
- UI designer
- Project manager
- Web developer
- Quality assurance agents
Again, this is why it’s much easier to just go through an agency. Assembling a team like this on your own is challenging. Ecommerce app development agencies will have all of the resources in-house to accommodate your needs.
How Much Does it Cost to Create a Shopping App?
The average cost to create a shopping app ranges from $30,000 to $700,000, with a median of $171,450, according to a recent survey,
But there are lots of different factors that contribute to the cost, including:
- Development method (native vs. cross-platform)
- Location of development team
- App complexity
- Features
- Tech stack
For example, hiring a freelance developer in India to create your app will likely be cheaper than using a US-based agency. But there will likely be a significant difference in the quality of the final product between these two options as well.
Using a cross-platform development solution is one of the best ways to save money here, as you won’t need to create two separate apps for iOS and Android. You can make an app for both platforms with a single build.
Discovery Phase
The discovery phase is an important step here when you’re consulting with different agencies. You can shop around and get a quote from your top considerations to get a better understanding of the cost, timeline, and other factors.
Essentially, you just want to get a feel for the agency and see if they sound like a good partner for your shopping app development project.
BuildFire Plus is our all-inclusive app development service.
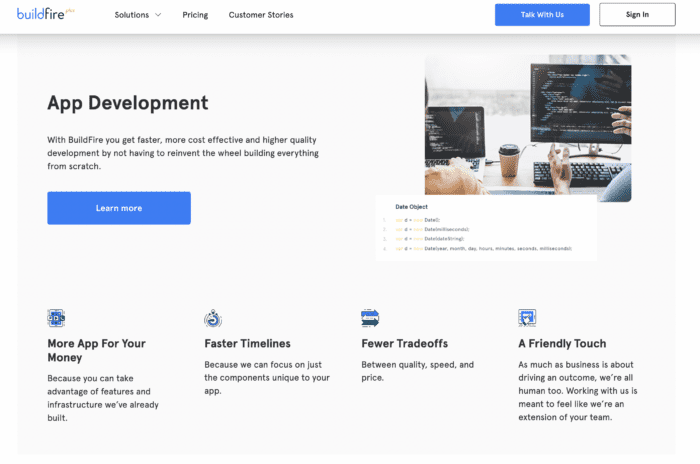
We offer everything from pre-development strategy sessions to post-launch maintenance and support. We’ll help you run a competitive analysis to validate your idea and get started with prototypes, wireframes, and mockups before the build.
Our expert development team can create a custom shopping app for iOS and Android faster than traditional development solutions without sacrificing quality. We’ll work with you each step of the way to ensure your app achieves its intended goals.
Step 4 — Identify Essential Features for Your Shopping Application
Now it’s time to think about the features you want to include in your shopping app. Try not to get too carried away here with the “nice-to-have” features. First, focus on the bare minimum and essentials required for your app to run smoothly.
You can always add more features later.
We’ll cover some examples of different essential features in greater detail below:
User Registration and Sign-In Process
The best shopping apps offer the ability for users to sign up and create an account. This gives them the ability to save key information in the app, like their name, shipping address, billing address, and payment information.
This will help increase your conversion rates as your users won’t have to manually enter these details for each purchase. They can simply add something to their shopping cart and buy it with a single click.
Letting users create an account can also help you customize their shopping experience with recommended items based on their purchase history.
Easy Navigation
It should be really easy for users to find what they’re looking for when they’re browsing for products in the app. A good rule of thumb is that every product page should be no more than three clicks from the home screen.
That’s why it’s so important to put your wireframes on paper before you start building anything, as this will help you design a smooth user flow. You can borrow ideas from big players like Amazon to map out your navigation.
User Profile Editing
Give users the ability to edit their profiles with preferences. Registration should only ask for the minimum information required to create an account. But give them the option to go back and change their settings at any time for an enhanced customer experience.
For example, users shouldn’t have to enter their birthday to register. But you can ask them to add that information to their profiles later on if they want to receive special deals on their birthday.
This is a chance for them to customize other preferences, like managing what types of push notifications they want to receive.
Product Catalog
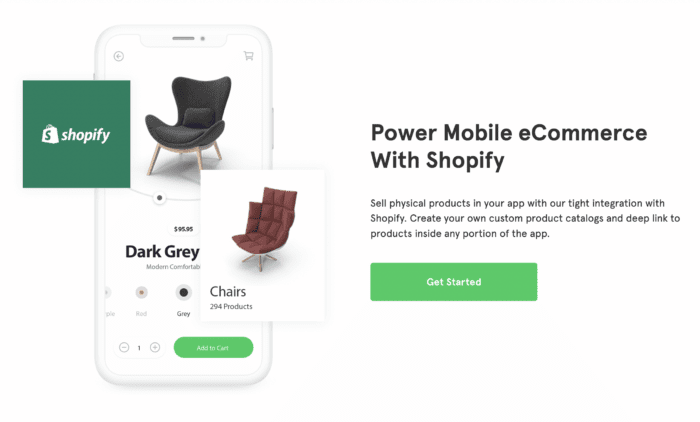
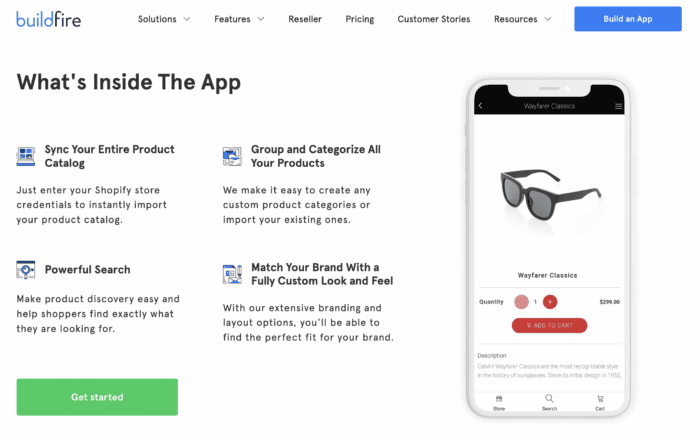
Obviously, you need to sync your shopping app with your product catalog. This is not only necessary for the app’s functionality, but it will also help you manage inventory and fulfillment.
For example, if you have an existing Shopify store, you can simply sync your Shopify account to the app to import the product catalog.
In-App Smart Search Engine
This feature is really important for any shopping app with more than a dozen or so products.
You can’t expect users to scroll through hundreds or thousands of products to find what they’re looking for. So you need to give them the option to search for products by name or narrow down the results through a search filter. Filter options could include parameters like gender, size, color, product type, etc.
User Reviews
Roughly 95% of consumers read reviews before they buy something.
That’s not all. According to BigCommerce, products with at least five reviews are 270% more likely to sell.
It’s no secret that user reviews have an influence on mobile purchasing decisions. So make sure you include reviews on your product pages.
Shopping Cart
Obviously, you need to have a shopping cart feature and payment gateway to process transactions.
There are hundreds of options to consider here, like Stripe. In many cases, you can use the same shopping cart solution that you’re using on your website. Otherwise, you can talk to your development agency to see what they recommend.
Easy Checkout and Payment Options
The best shopping apps have a smooth checkout process. Eliminate any friction in this process and make sure that customers can add items to their cart and finalize the purchase with as few clicks as possible.
Offering as many payment options as possible is another way to keep conversions high.
The options will typically depend on the shopping cart software you’ve selected. But the best shopping carts will support:
- All major credit cards (Visa, Mastercard, American Express, Discover)
- Debit cards
- PayPal
- Apple Pay
- Google Pay
This is the bare minimum that you should be accepting. But the more payment options you have, the better it will be for your conversion rates.
Ideally, you’ll want users to buy from their profile. But having a mandatory login can be problematic, so you should still offer a guest checkout option.
Shipping Options
You should offer some form of free shipping option, even if you require users to spend a certain amount of money to receive free shipping. Roughly 70% of consumers say they abandon shopping carts due to shipping costs.
Offering multiple shipping options at varying costs can also boost conversions. Give your customers the option based on how quickly they want the shipment. Examples include:
- Free standard shipping (5-7 business days)
- $7 rush shipping (3-5 business days)
- $25 expedited shipping (next day)
Again, it’s all about giving your customers as many options as possible to accommodate their needs.
Key Admin Panel Features for Online Shopping Apps
In addition to the customer-facing features for your shopping app, you need to consider the features that you’re going to use on the admin side to manage your application.
- Order Tracking
- Inventory Management
- Catalog App Builder for Product Management
- Customer Relationship Management (CRM)
- Customer Support Tools
This is something you need to evaluate when you’re comparing different development solutions and agencies. See what they’re going to offer you in terms of management features and how those features will impact your costs.
Step 5 — Identify Additional Features That Help Your Store Stand Out
Now you can start thinking about other features that go beyond the basic functionality mentioned above. To be clear, you do not need to add these additional features right now.
For your first build, you should focus on simplicity and getting your app to work as it’s intended. Adding too many features at once can be messy and ultimately take away from your app’s primary purpose.
With that said, you can start to brainstorm these ideas now and think about them for future updates. Examples include:
- Customer wish lists
- iBeacon
- Maps
- Augmented reality
- Machine learning
- Social media sharing options
- Barcode scanner
- Push notifications
- Chatbot for improved customer service
Again, none of these features are required for your ecommerce app to work. But they are “nice-to-haves” that could ultimately help your app stand out from competitors.
For example, if you’re creating a shopping app as an extension of your brick-and-mortar retail business, adding a barcode scanner can enhance the in-person shopping experience with mobile. Users could scan a product in-store to see user reviews and save it to their wish list for a later purchase.
But for now, you probably don’t need to worry about adding these features. Just focus on getting your app to market.
Step 6 — Create a Mockup of Your Online Store App
Mockups are non-functional static designs of an app. This will help you and your team understand the look and feel of your final product.
The purpose here is to help establish things like fonts, visuals, images, content layouts, color schemes, and the overall user experience from a design standpoint.
Wireframes, designs, mockups, and prototyping are all part of the BuildFire Plus white-glove service offering.
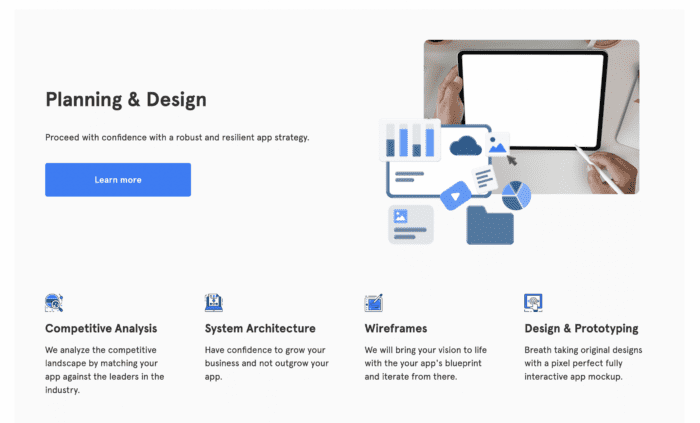
This stage ensures that you’re on the same page with our design and development team before they start building your app.
Step 7 — Begin Mobile Shopping App Development Process
By now, you should know the answer to the following questions:
- What platform or platforms are you building on?
- What development method are you using?
- What app development company are you proceeding with?
- What features do you need for an MVP (minimum viable product)?
Now you can actually start building the shopping app. If you’re outsourcing this to a development company, then there’s really not much work for you to do here.
Just make sure you have a basic understanding of the development timeline and have a rough idea of when the app will be ready. In the meantime, you can start putting together promotional materials and build some hype for your app with marketing strategies prior to the official launch.
Step 8 — Test Your Shopping App
Once the app is finished, you need to test it before making it available for real users.
First, you need to make sure the app is bug-free. Then you need to verify that it works as intended. There are lots of different approaches for application testing, including alpha testing, beta testing, user testing, and more.
Aside from looking at software glitches, you should use this as an opportunity to gather user feedback and conduct additional research.
No app is perfect, and there’s always room for improvement. So try not to focus on getting everything perfect prior to launch. Otherwise, you’ll be stuck in development forever.
But the idea here is to put out a product that’s fast and functional without crashing.
Step 9 — Launch Your Shopping App
Now it’s time to officially launch your shopping app!
You’ll need to get it submitted to the Apple App Store and Google Play Store. Each of these platforms has different requirements for approvals and submissions, so make sure you understand the guidelines thoroughly before submitting.
Examples of what you’ll need here include an app name, description, screenshots, app category, and an app icon.
To ensure your app is highly visible in searches, check out our complete guide to app store optimization (ASO).
Make sure you’re promoting your app on your website, social media, and as many channels as possible to get the word out. Your app marketing strategy will have a direct impact on your downloads.
Conclusion
Shopping apps are superior to mobile websites in terms of revenue generation, conversions, and customer satisfaction.
If you’re ready to get started, reach out to our team at BuildFire for a free strategy session. We can create a custom ecommerce app with all of the features you need to succeed. We’ll assist you with the pre-development steps and even handle your post-launch updates and maintenance.